Enclosure Build for Local Customer -- For a PG Cyclone :-)


Gold Member
Username: Dustin3

Box Designer & Builder...Dustin

Post Number: 5406
Registered: Oct-05
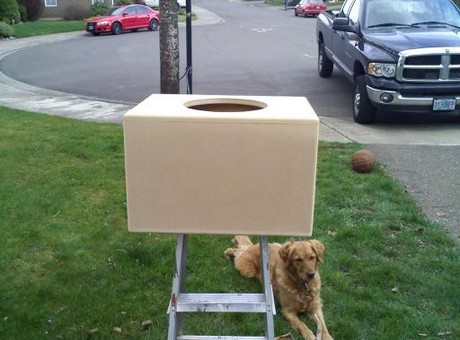
Here is another small build. Except this time its for a local custom for his PG Cyclone for a HT set-up :-) I cannot wait to here this thing. I have only heard positive things about the cyclone and hear that is dominates the lower teens (10-13hz) will ease without breaking a sweat. But also kill the highs as well. For those who don't know much about the cyclone, take a look here.

http://www.soundimage.dk/Different-col/LinearMotor.htm

scroll down a bit ^^^

The cyclone has no cone... and uses the rotational force of the fan-like magnet to drive the radiator. It also has no voice coils, spiders or surrounds and is able to convert very low frequencies into some an acoustical output. It's quite scientific and it goes into details.

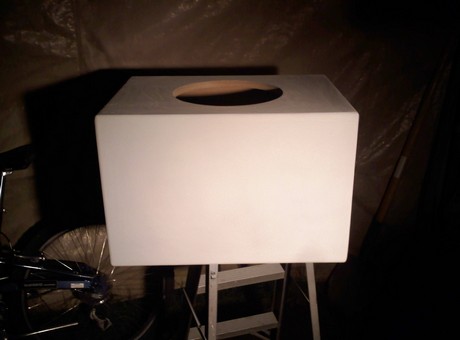
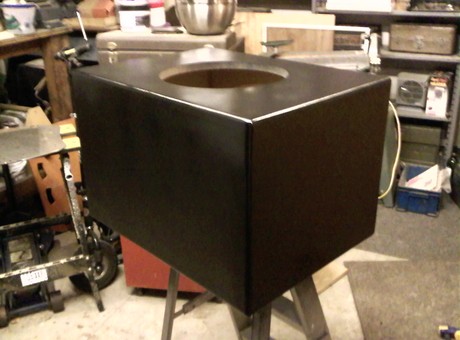
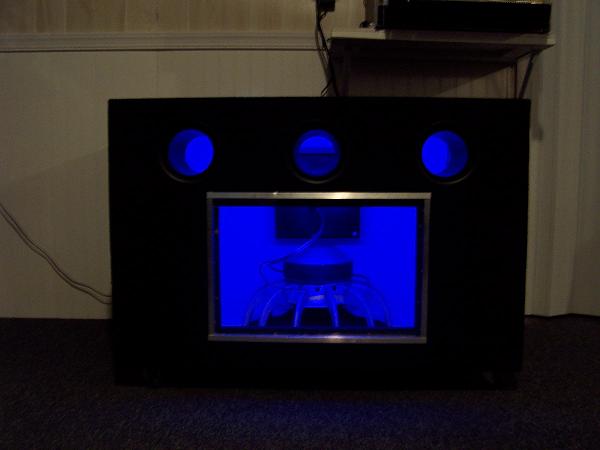
Anyway, Custom wanted it to be "murdered out" with glassy black spray paint. I think he should be pleased :-) Needs another coat and then the clear coat. Sorry for the bad pic of the finish in the garage, there was horrible lighting.

Box is 2.5 cubes sealed.

Upload

Upload

Upload

Upload

Upload
 

Gold Member
Username: Mendonmafia

USA

Post Number: 1988
Registered: Aug-06
simply amazing.

if you dont mind me asking how much was your table saw?

do u have a table router too?
 

Silver Member
Username: Gcs8

Atlanta, Ga

Post Number: 277
Registered: Sep-09
so video of it when fished?
 

Silver Member
Username: Simple_smith

Lapeer, Michigan United States

Post Number: 307
Registered: Dec-08
^^ haha subs can't fish

but seriously, looking forward to seeing some vids of final install
 

Gold Member
Username: Dustin3

Box Designer & Builder...Dustin

Post Number: 5407
Registered: Oct-05
Yes, def. some vids :-) I have a Makita table say but I took off the fence and made my own table that goes around the saw so I could slide through bigger sheets. I am going to be making my own fence this summer for my table saw with some ball bearings and some rods. I will be have a how to/build log for that for those DIY'ers out there.

And yes, I have a Dewalt router with all bits.
 

Gold Member
Username: Mendonmafia

USA

Post Number: 1991
Registered: Aug-06
those cuts are amazing everything lines up so perfectly. i need a better table/table saw asap.

mind showing me how you made your table?

im guessing you clamped everything too? i dont see and brad holes or screws.
 

Gold Member
Username: Dustin3

Box Designer & Builder...Dustin

Post Number: 5408
Registered: Oct-05
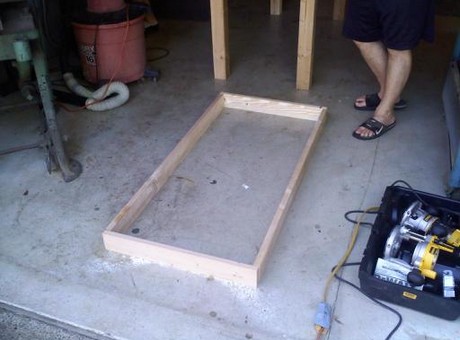
For this box, I just used clamps and glue because It was such a small box and only 300w was going to be going in it. I usually (as you see in my other builds) use screws every 4-5 inches or so.

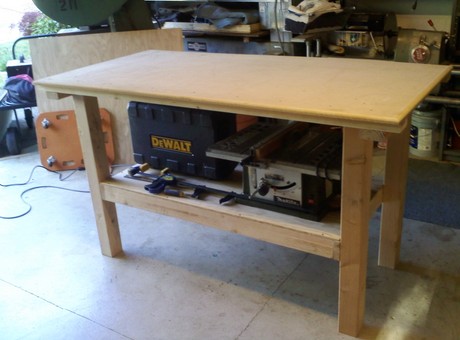
And yes, all my cut's are pretty much right on the money. I will post up some pictures in a couple minutes of my table saw. I will be building a bigger and better one this summer hopefully.
 

Gold Member
Username: Dustin3

Box Designer & Builder...Dustin

Post Number: 5409
Registered: Oct-05
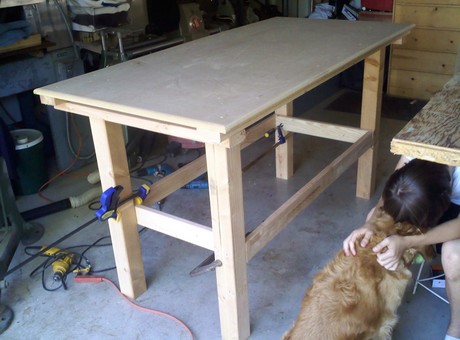
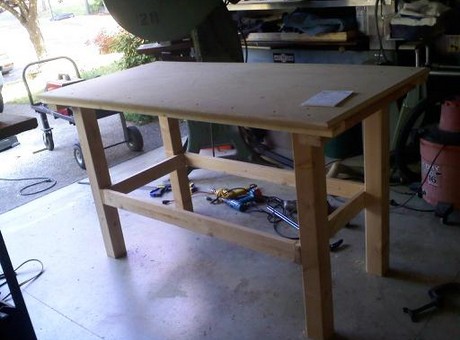
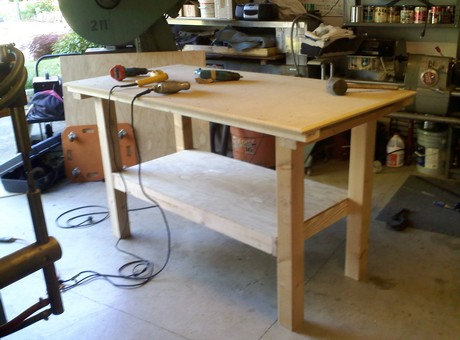
Here are some pics. I don't have any pictures unfortunately of the table saw actually up in the table itself. But in the last picture you see the Makita table saw. When looking at it now, we just cut a square cut-out (the size of the Makita saw outer fence) around the middle of the table. I then used a 4 2x4's and mounted them underneath the table saw to hold it up. This way, its very easy to just take out if need be. I will try to get some more pictures for you when I get back to the shop. This is not my shop in the pictures.

Upload

Upload

Upload

Upload

Upload
 

Gold Member
Username: Mendonmafia

USA

Post Number: 1993
Registered: Aug-06
thanks. i cant wait to see it. ive been trying to convince my father to buy a new bigger table saw but hes not budging haha. he might be up for making a bigger table tho. would need to make a fence for sure though or it wont really be much better than a circular saw imo.

if i had the clamps i would never use screws fyi. pilots and countersinking every hole is a PITA. its the glue that holds it together anyways the screws just apply pressure to the glue which for gorilla glue (which i exclusively use) is nice since it helps it expand more and infiltrate the wood pores.

i mean i can get my cuts pretty close but thats just amazing ant not a bit of burn from the blade.
 

Gold Member
Username: Dustin3

Box Designer & Builder...Dustin

Post Number: 5410
Registered: Oct-05
No problem :-) and to be honest it does not take any more time to use screws for me since I have 3 drills set-up at all time (one for pre-drill, countersink, then Phillips head) so it does not take any more time then to clamp it and let it sit. Gorilla glue is not my choice for glue for MDF but that's just my honest opinion. I can break the bond if I tried with gorilla glue but cannot break the bond without snapping the board when using titebond.

And for a temporary fence, you can just make lines and measurments outwards from the saw blade it's self and label the #'s on the edge of the table. The use a straight piece of ply of some sorts and use that as a fence for the wood to slide against.
 

Silver Member
Username: Jbpitt

Pittsburgh, Pa. Usa

Post Number: 244
Registered: Jul-09
Nice work on the box man! Thats quite an interesting sub,cant what to see vids.
 

Gold Member
Username: Dustin3

Box Designer & Builder...Dustin

Post Number: 5412
Registered: Oct-05
Thanks Sean. Yours is up next!
 

Gold Member
Username: Dustin3

Box Designer & Builder...Dustin

Post Number: 5413
Registered: Oct-05
I am hoping to have some vids this weekend..
 

Silver Member
Username: Jbpitt

Pittsburgh, Pa. Usa

Post Number: 245
Registered: Jul-09
Cool, dam box looks so good i almost dont want you to put carpet on mine! lol
 

Gold Member
Username: Dustin3

Box Designer & Builder...Dustin

Post Number: 5415
Registered: Oct-05
haha. We'll it's up to you
 

Silver Member
Username: Jbpitt

Pittsburgh, Pa. Usa

Post Number: 247
Registered: Jul-09
^I sent you an email btw
 

Diamond Member
Username: Wingmanalive

Www.stainles... .ecrater.com

Post Number: 22381
Registered: Jun-06
Nice. Will that sub be firing down then? Are you going to install small legs?
 

Gold Member
Username: Dustin3

Box Designer & Builder...Dustin

Post Number: 5417
Registered: Oct-05
The sub will actually be inverted. And no, the customer is going to put some extra legs on that he has laying around.
 

Diamond Member
Username: Wingmanalive

Www.stainles... .ecrater.com

Post Number: 22383
Registered: Jun-06
Ahh. Kinda like what I did with my mag then.
 

Gold Member
Username: Dustin3

Box Designer & Builder...Dustin

Post Number: 5418
Registered: Oct-05
What did you do with your mag paul? you still have it?
 

Diamond Member
Username: Wingmanalive

Www.stainles... .ecrater.com

Post Number: 22384
Registered: Jun-06
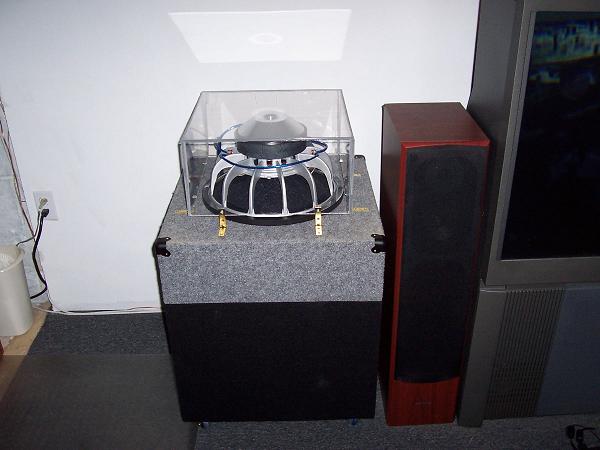
I made a box for it for HT and had it inverted also. I made a bad move in surrounding it with a plexi framed dust cover. The mag simply blew it apart lol. The box was a brick sh1thouse but the plexi, not so much.


Sold the mag and onto my Q. Yall remember that build.


Upload
 

Gold Member
Username: Dustin3

Box Designer & Builder...Dustin

Post Number: 5419
Registered: Oct-05
Looks very nice!
 

Diamond Member
Username: Wingmanalive

Www.stainles... .ecrater.com

Post Number: 22385
Registered: Jun-06
This is what the mag setup looked like.


Upload


Even though the plexi wasn't sealed the sub just destroyed it with vibrations. It was meant as a cover but the Maggie still blew it apart.


Oh I do miss her lol.
 

Diamond Member
Username: Wingmanalive

Www.stainles... .ecrater.com

Post Number: 22386
Registered: Jun-06
I have build threads on both setups posted here on E.

Those here long enough have HAD to see them lol.
 

Gold Member
Username: Dustin3

Box Designer & Builder...Dustin

Post Number: 5420
Registered: Oct-05
I didnt see them because I was on a ecoustics break for about a year lol
 

Diamond Member
Username: Wingmanalive

Www.stainles... .ecrater.com

Post Number: 22388
Registered: Jun-06
Well then.....


https://www.ecoustics.com/electronics/forum/off-topic/310908.html


https://www.ecoustics.com/electronics/forum/off-topic/340368.html
 

Gold Member
Username: Mrskullz1

New York

Post Number: 1476
Registered: Feb-07
Paul if you don't mind me asking, how much would a build like that go with all materials and lights? And would you be willing to build a box like that for someone? Would be for a car tho.
You can PM me since I don't wanna hijack the thread.
 

Silver Member
Username: Wackzirth88

K-town, Il U.S.

Post Number: 311
Registered: May-09
Bassman, any pics or vids of this thing in action. I'm curious to see it, looked up some vids on youtube but didn't find any with the cyclone in a box
 

Diamond Member
Username: Wingmanalive

Www.stainles... .ecrater.com

Post Number: 22413
Registered: Jun-06
Just saw the post Skullz. I'll PM you.


Can you email me since your info has been lost on my side?


I apologize Mr. Bassman 3.
 

Gold Member
Username: Dustin3

Box Designer & Builder...Dustin

Post Number: 5435
Registered: Oct-05
It's fine Paul no worries :-)

And no vids yet, the customer is waiting until he gets his new amp to power it. Don't worry though, there will be vids up!
 

Platinum Member
Username: Glasswolf

Columbia, SC USA

Post Number: 12453
Registered: Dec-03
so you used spray paint for that finish? it came out nicely.

I personally would have ended up using a shellac and hand rubbing it out to get a piano finish (traditional piano finish) but that would have been a LOT more time and money. It came out nicely considering the technique. With a solid wood, you can do nice routed edges like that and get great results. I'm actually doing the same at present using teak to make a center channel speaker stand for my home theater, but that is getting varnished, not stained or shellac.

There are also some new brush-on paints that give a "wet paint" black piano finish, too. You might want to take a look at those. They're pretty cheap, too. I have a can of it around here somewhere.
It's an acrylic finish.
 

Gold Member
Username: Dustin3

Box Designer & Builder...Dustin

Post Number: 5437
Registered: Oct-05
I have tried into the piano finish before Glasswolf. Is there someway I can contact you (possibly through email?) to get some input on the finishes you listed?
 

Platinum Member
Username: Glasswolf

Columbia, SC USA

Post Number: 12456
Registered: Dec-03
pretty much any paint shop should have the acrylic wet-look piano finish. just ask for it like that.

The place I got mine was back in Michigan though, and I'm no longer there anymore. I moved last summer, so I don't have all the sources for those materials locally yet.
 

Platinum Member
Username: Nyyfan13

Northern VA

Post Number: 11844
Registered: Jul-06
In before everyone jumps in this thread to try and dry hump GlassWolf.


Good to see you GW. Hope your health is better.
 

Gold Member
Username: Van_man

Boston South, MA

Post Number: 5207
Registered: Mar-06
Very nice box. What are you using for primer? latex or oil?
HD now sells a piano finnish paint. I have yet to try it out. Also, there is an additive you can add to paint to prolong the dry time, thus giving it more time to flow out and make it smooth. It is used to lubricate paint for latex spray guns. It may be compatible with oil based as well.
Or just add paint thinner or acatone to help it flow better.

I keep checking this thread for cyclone pics...:-(

And lol Yanks.
 

Platinum Member
Username: Glasswolf

Columbia, SC USA

Post Number: 12458
Registered: Dec-03
doin alright. the move had me occupied for a while.
 

Gold Member
Username: Dustin3

Box Designer & Builder...Dustin

Post Number: 5438
Registered: Oct-05
Soon Enough Odd. I am just waiting on him at the moment. I will have to try some piano finish in the future :-) The thing about that is that I do not have a spray gun/compressor. Not sure on how the piano finish would look without one. That's what experiments are for!
 

Silver Member
Username: Gcs8

Atlanta, Ga

Post Number: 297
Registered: Sep-09
maybe for your birthday i will get you an air compresser
 

Diamond Member
Username: Wingmanalive

Www.stainles... .ecrater.com

Post Number: 22423
Registered: Jun-06
They are a tool of MANY uses.
 

Platinum Member
Username: Glasswolf

Columbia, SC USA

Post Number: 12465
Registered: Dec-03
you don't need a spray gun. you can thin the paint a little and apply it with a brush. Then you just need to spend a little time on finishing the paint surface once it's dried and cured. some ultra-fine grain sand paper (800-2000 grit wet/dry) will give you a smooth surface. Then you can just polish it out and bang, shiny mirror like surface.

The process isn't too different from lapping a computer processor.
« Previous Thread Next Thread »


Main Forums

Today's Posts

Forum Help

Follow Us