Nick's PodLog ©


Gold Member
Username: Tatonka

-[Team Audible Insanity]-

Post Number: 3243
Registered: Mar-07
Yeap, time for another pod build. Each pod will have 2 DD 6.5s along with one tweeter.

Got the shape I want laid down on the tin foil
Upload
Upload

Put some fiberglass/resin on them
Upload

And now we play the waiting game.
Upload

More progress tonight after work and tomorrow.

*Kevin, don't you wish my old pods would fit your doors :-)
 

Gold Member
Username: Big_edge_head

Milwaukee, WI

Post Number: 4248
Registered: Mar-07
looks good man cant wait to see more.
 

Silver Member
Username: Gcs8

Atlanta, Ga

Post Number: 131
Registered: Sep-09
<<<< two afraid to start cutting up the new car just yet. more pix ^_^
 

Gold Member
Username: Kingandsons07

TEAM NEBRASKA Lincoln,NE

Post Number: 1110
Registered: Aug-08
looks great! lol ok so how are those hids working?
 

Platinum Member
Username: Nd4spd18

Philadelphia, PA

Post Number: 10888
Registered: Jul-06
This is one skill i envy in some people, ability to do custom interior work and make it look good.
 

Gold Member
Username: Van_man

Boston South, MA

Post Number: 5132
Registered: Mar-06
Looking good.

"This is one skill i envy in some people, ability to do custom interior work and make it look good"

"and make it look good" is the key. Some pods ive seen are terrible.
Like M.S.'s Sponge bob square pod ones. lol.
 

Silver Member
Username: Gcs8

Atlanta, Ga

Post Number: 134
Registered: Sep-09
if i dident suck at craft work i would totaly try, only thing i am good at for car audio is wireing sh!t up, and tuneing.
 

Gold Member
Username: Wolf_hound

Phoenix, AZ

Post Number: 1110
Registered: Sep-05
lmao marc
 

Platinum Member
Username: Nd4spd18

Philadelphia, PA

Post Number: 10889
Registered: Jul-06


hey it is functional tho
 

Gold Member
Username: Pitbullguy

The Chicago area

Post Number: 4095
Registered: Oct-06

quote:

Like M.S.'s Sponge bob square pod ones. lol.


pics please!
 

Gold Member
Username: Tatonka

-[Team Audible Insanity]-

Post Number: 3244
Registered: Mar-07
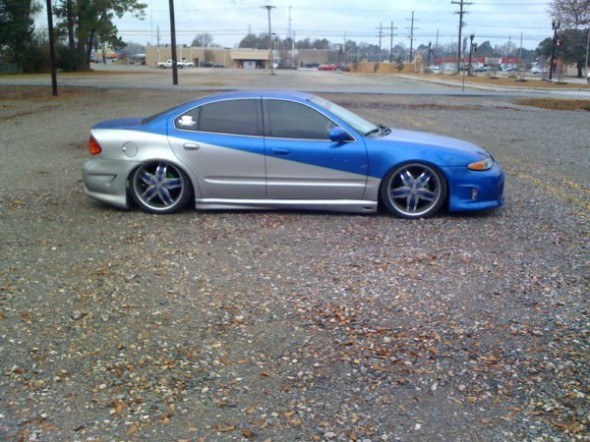
M.S.'s pods are extremely functional. I can't hate on them since they go good with the body style of his vehicle.

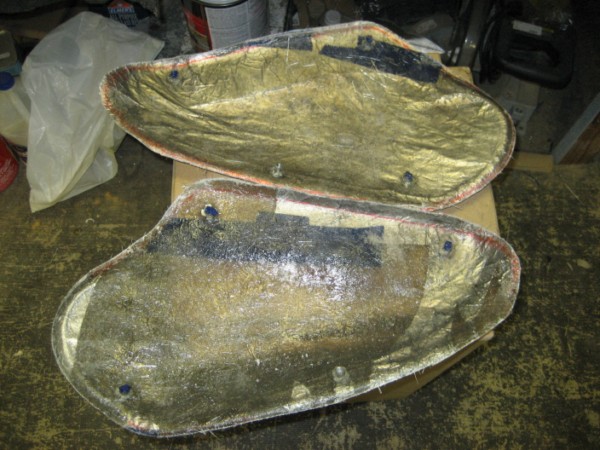
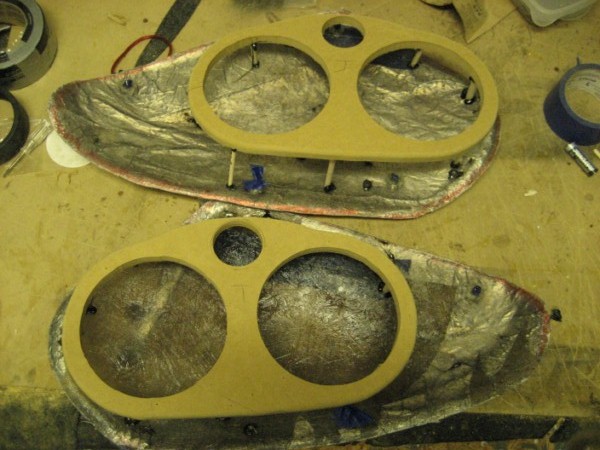
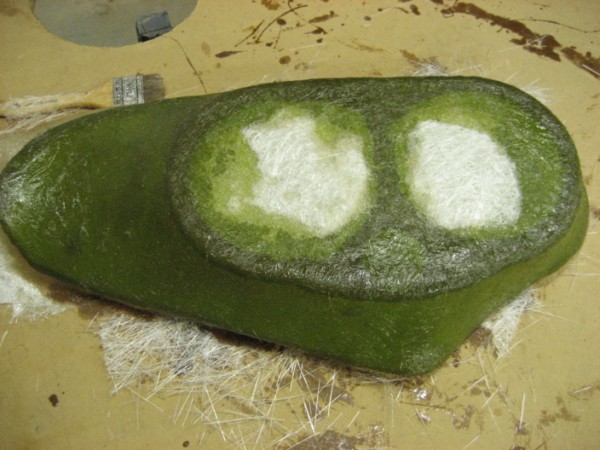
I got some more progress pics, I will post all of today's work later tonight since I do not have a car reader on this computer lol. The molds came out extremely strong with only 4 layers. Today I will be getting my speaker rings set up and hopefully glass each pod.
 

Gold Member
Username: Loc_out

SoCal

Post Number: 3062
Registered: Feb-05
Can't wait to see the finish product.
 

Gold Member
Username: Tatonka

-[Team Audible Insanity]-

Post Number: 3246
Registered: Mar-07
Thanks for the compliments guys. I didn't get as much done yesterday as I wanted due to rain.

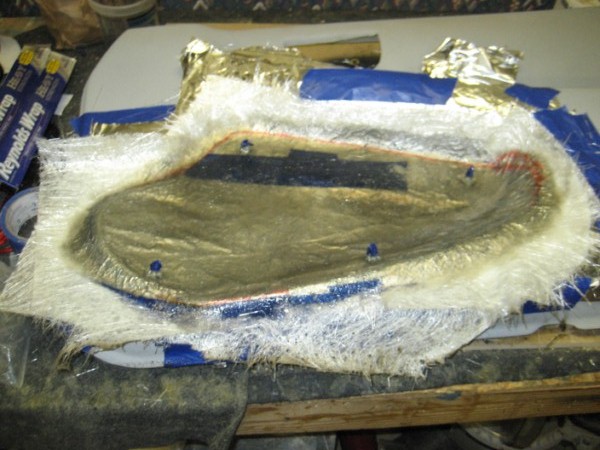
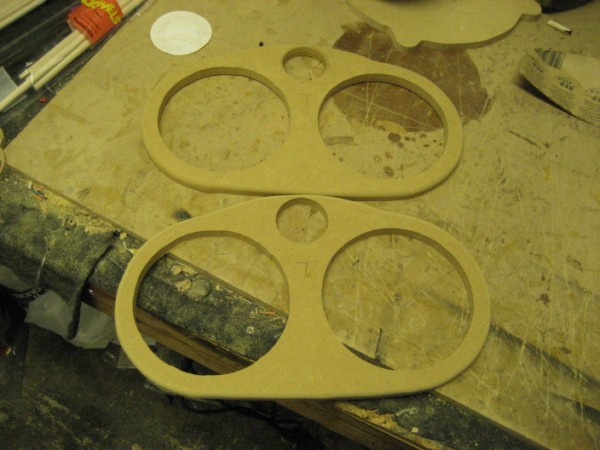
Once I laid down my first 2 layers, I let them cure, then I drilled my mounting holes. I put a bolt through the hole, then took some T-nuts and used 2 more layers of fiberglass to hold them in place.
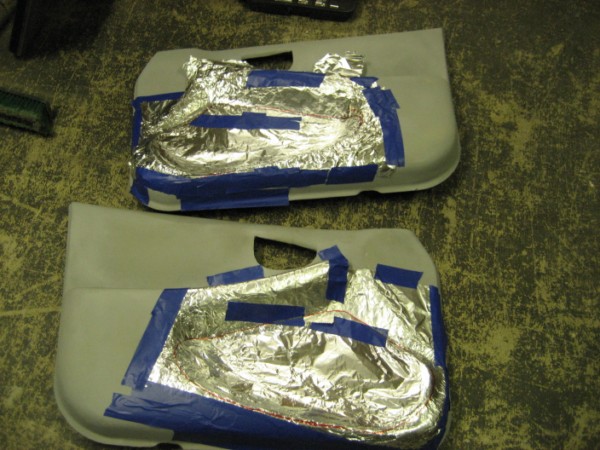
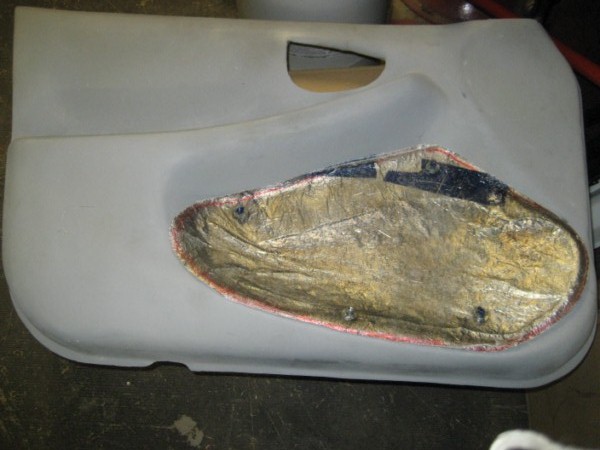
Upload

Backside of door
Upload

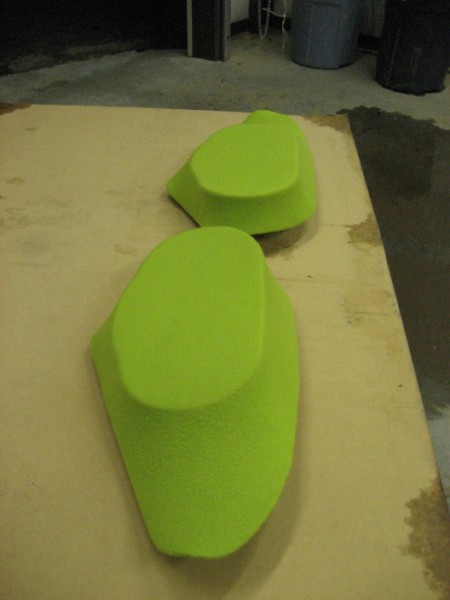
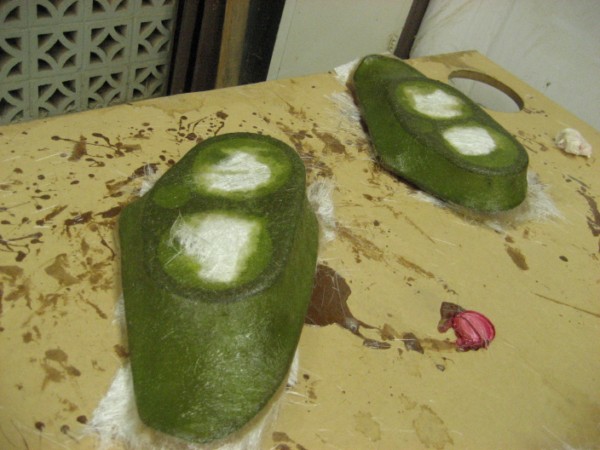
I took an air saw and I started trimming them to shape. I didn't get to finish this step due to the air saw burning up. FML
Upload
Upload

Will get the final shape cut out later. Taking a break on these for the rest of the day and maybe the weekend lol.
 

Silver Member
Username: Armykyle1

Ms Us

Post Number: 845
Registered: Dec-08
Looks good. I'd like to try this too buttttt I have no skill like that
 

Silver Member
Username: Gcs8

Atlanta, Ga

Post Number: 145
Registered: Sep-09
i think jew just found a new way to get money from us.
 

Gold Member
Username: Ducka

Shelby Twp., MI United States

Post Number: 1323
Registered: Jan-08
Why wont your old ones fit my car???

I was ready to throw money at you for them.

PS Lookin good so far!
 

Gold Member
Username: Ducka

Shelby Twp., MI United States

Post Number: 1324
Registered: Jan-08
why wont they fit bump?
 

Gold Member
Username: Tatonka

-[Team Audible Insanity]-

Post Number: 3251
Registered: Mar-07
Because you have a 2 door. The front doors are a lot longer on yours.

See:

(it was snowing a little bit when I took this pic)
Upload
 

Gold Member
Username: Big_edge_head

Milwaukee, WI

Post Number: 4258
Registered: Mar-07
Car looks badass man. I don't see any snow. }
 

Gold Member
Username: Snowball123

West Allis, WI

Post Number: 3379
Registered: Oct-07
nice rims.

always liked the paint job also.
 

Gold Member
Username: B3n07

Louisville, Ky USA

Post Number: 1175
Registered: Jul-07
hey nick if i send you my door panels and kick pannels could you hook me up
 

Gold Member
Username: Ducka

Shelby Twp., MI United States

Post Number: 1326
Registered: Jan-08
Hey jack knob, I dont have a 2 door! Give me those pods right now!!!!!
 

Platinum Member
Username: Insearchofbass

York, Pennsylvania

Post Number: 12958
Registered: Jun-04
Looking good
 

Gold Member
Username: Jtown

Texas

Post Number: 4003
Registered: Mar-07
are those 20's?

car looks much better now with wheels that fit lol..

did you ever finish the turbo setup?
 

Silver Member
Username: Domenico

BanginGMCArizona

Post Number: 397
Registered: Apr-09
Always wanted to do this...

seen a couple youtube vids of how its done, seems simple.
 

Gold Member
Username: Tatonka

-[Team Audible Insanity]-

Post Number: 3262
Registered: Mar-07

quote:

hey nick if i send you my door panels and kick pannels could you hook me up


Possibly.

quote:

Looking good


Thanks bro.

quote:

are those 20's?
car looks much better now with wheels that fit lol..
did you ever finish the turbo setup?


Yeah they are 20"s lol. I got the turbo setup done. Runs amazingly well, but I still need to do some tuning for the idle AFR.


quote:

seen a couple youtube vids of how its done, seems simple.


Some vehicles are simple, yet some are incredibly hard. I think the hardest part of my pods are going to be the body work to get it to a paintable stage.


I will be working more on the pods next week I hope. I've been sick and busy with school. It sucks.
 

Gold Member
Username: Tatonka

-[Team Audible Insanity]-

Post Number: 3271
Registered: Mar-07
Quite an update here. Been working on these things till 10 or so every night for the last week.

My speaker mounts compliments of Canaan. Great idea BTW
Upload

Got them in place using dowel rods and hot glue
Upload

Stretching my fleece
Upload

Where I am working.
Upload

Fleece is stretched on the pair and ready for resin
Upload
Upload
Upload
Upload

This is where I am leaving it tonight. Tomorrow I will start laying glass and then Saturday I hope to get some body work accomplished.

kbye
 

Platinum Member
Username: Insearchofbass

York, Pennsylvania

Post Number: 13092
Registered: Jun-04
Looks like its coming out just fine good work
 

Silver Member
Username: Domenico

BanginGMCArizona

Post Number: 536
Registered: Apr-09
Can you give me a list of materials needed to do this please?

Dom
 

Gold Member
Username: Tatonka

-[Team Audible Insanity]-

Post Number: 3274
Registered: Mar-07

quote:

Can you give me a list of materials needed to do this please?


It really depends on what you need to do to achieve the shape you want.

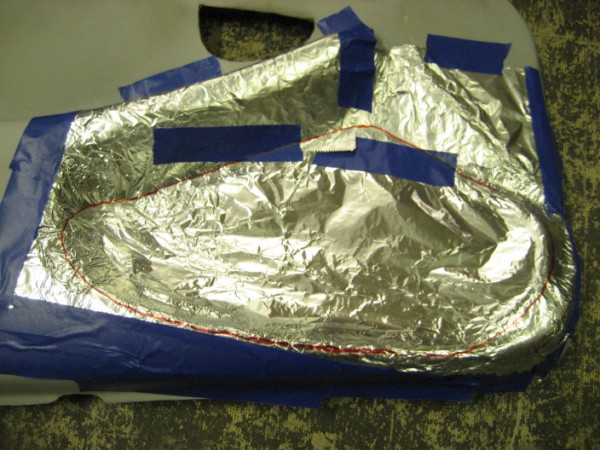
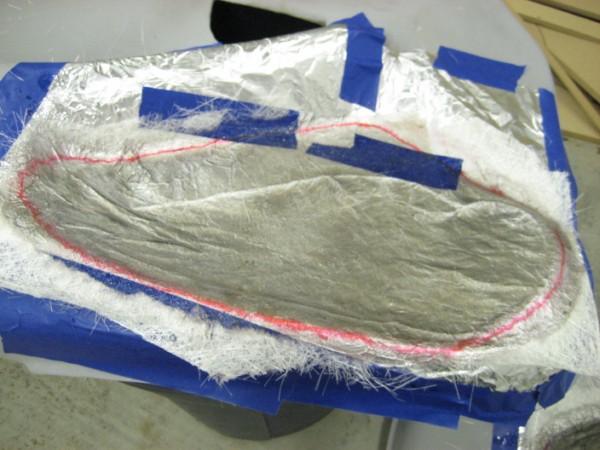
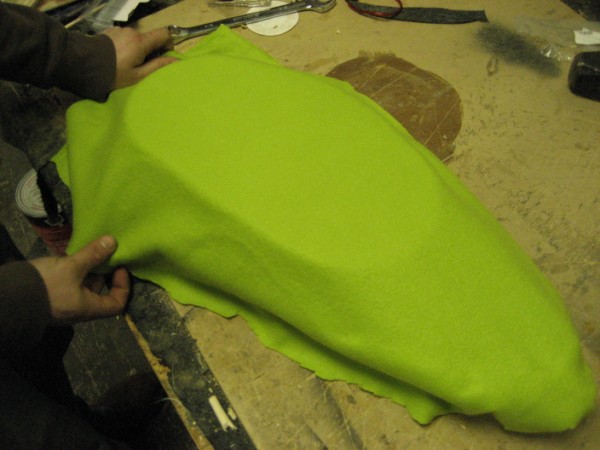
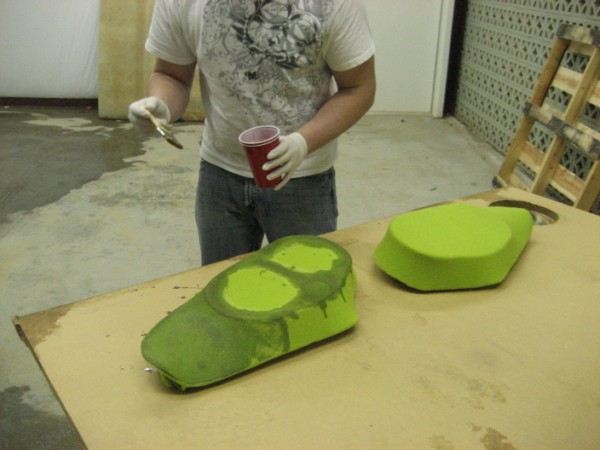
I used:
Tin foil (to protect door when I was making my mold)
Blue tape (holds down the foil)
Resin (i prefer B-440 from uscomposites)
Glass mat (to apply resin to for strength)
MDF (to make speaker rings)
Dowel rods (to hold speaker rings up)
Stretchy fleece (you stretch this over your mold)

As for mixing resin, I use dixie cups, laytex gloves, and a box of paintbrushes from harbor freight.
 

Gold Member
Username: Bernymac

Phnom PenhCambodia

Post Number: 4785
Registered: Sep-04
Look at nick, ecoustics fiberglassing guru :-).
 

Silver Member
Username: Domenico

BanginGMCArizona

Post Number: 551
Registered: Apr-09
I want to do door pannels Ina s15.
So you say you use tin foil to protect the door, later on do you take the foil off the piece or does it mold with the piece?

Let me see if I got it: if I was to do some for yr doors I would:
mold the shape with foil, put that spider-web type cloth on, paint it with some resin goo then wait till it drys then get the mdf cut outs, (what'd you use to support em?) then once they are supported(in the air) add the fabric and paint some more resin on it then sand..... then what?
 

Gold Member
Username: Tatonka

-[Team Audible Insanity]-

Post Number: 3275
Registered: Mar-07
Another day late at the shop...
Upload

Got 2 layers on each pod. Turned out fairly nice.
Upload
Upload
Upload

As I wait for my fiberglass to simi-cure so I can transport them, Canaan shows off his....less-than musical talent.
Upload

Stay tuned.
 

Gold Member
Username: Tatonka

-[Team Audible Insanity]-

Post Number: 3276
Registered: Mar-07

quote:

So you say you use tin foil to protect the door, later on do you take the foil off the piece or does it mold with the piece?


You can leave the tin foil on, or take it off. Won't make a difference since it is the unseen side.


quote:

Let me see if I got it: if I was to do some for yr doors I would:
mold the shape with foil, put that spider-web type cloth on, paint it with some resin goo then wait till it drys then get the mdf cut outs, (what'd you use to support em?) then once they are supported(in the air) add the fabric and paint some more resin on it then sand..... then what?


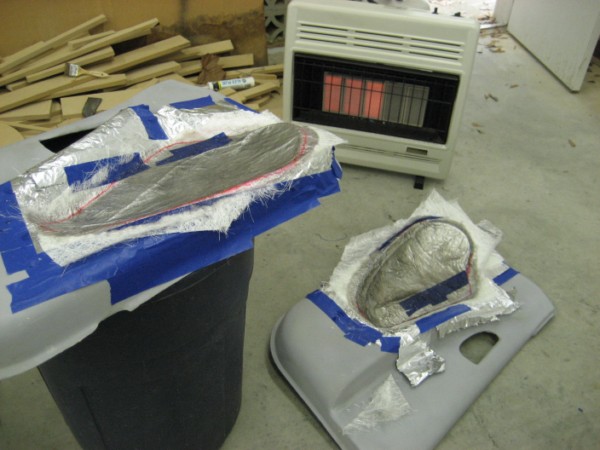
Correct. I used dowel rods to hold the rings in the air. Hot glue is your friend on that step.

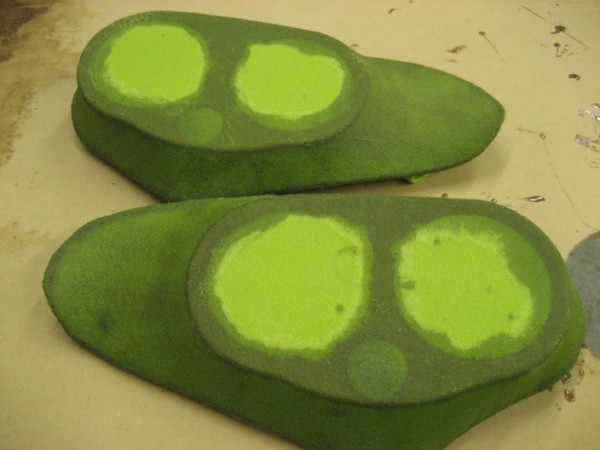
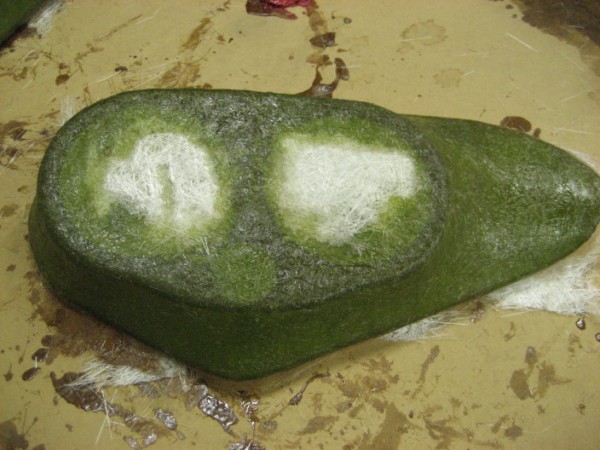
After you resin the fleece, you also add more mat on top of the fleece to add strength. (Resin'in the fleece is just for shape.) From there, u determine if you are going to paint or wrap your creation. Wrapping is sometimes easier because it requires less body work. Painting will require hours upon hours of sanding and body filling.
 

Silver Member
Username: Domenico

BanginGMCArizona

Post Number: 552
Registered: Apr-09
I seen people somewhere along the way use bondo.. what do they use that for?
Say I was going to fiberglass my dash board and paint it blue or something, would I have too use tin foil still? or can I just put the mat on the dash and start paintin the resin on it then fleece then resin then mat then more resin? ya know what I'm saying?
 

Gold Member
Username: Bernymac

Phnom PenhCambodia

Post Number: 4791
Registered: Sep-04
Nick, try the "milkshake". Its a mix of resin and body filler. Your pour it on and it creates somewhat of an even coat, little sanding required, and you can paint afterwards.
 

Gold Member
Username: Tatonka

-[Team Audible Insanity]-

Post Number: 3277
Registered: Mar-07

quote:

I seen people somewhere along the way use bondo.. what do they use that for?


That's body filler. It's used for filling in low spots.


quote:

Nick, try the "milkshake". Its a mix of resin and body filler. Your pour it on and it creates somewhat of an even coat, little sanding required, and you can paint afterwards.


I've used the milkshake, it works well for a beginner. I don't like bragging, but I've gotten so good at fiberglass layup that there are virtually no low or high spots lol. I may use a little putty in some places, but it's no problem.
 

Silver Member
Username: Cdb004

I got 6 12s 153.1 daily

Post Number: 137
Registered: Oct-08
You suck At overhead fiberglass lol
 

Gold Member
Username: Tatonka

-[Team Audible Insanity]-

Post Number: 3278
Registered: Mar-07

quote:

You suck At overhead fiberglass lol


feg.

jewburg out
« Previous Thread Next Thread »


Main Forums

Today's Posts

Forum Help

Follow Us