Box progress!!!!!
|
Gold Member Username: HockeyknightPost Number: 1067 Registered: Apr-06 | i got all the pieces cut and i just took a few home to paint em (for the port)....all i have left is to cut the sub hole, run the wires, and put it together obviously........any tips on how to not split the wood?? and i have 2 + - terminals.... can i run each VC to 1 terminal then wire it to the right load from there?? where i have the terminals they will be hidden so the mess isnt a problem i just dont have my Alt yet so i want to easily be able to change the load...... Thanks!! | |||||
|
Gold Member Username: WingmanaliveA pic is worth 1000 posts!! Post Number: 5562 Registered: Jun-06 | PREDRILL!! Stay away from the corners(3-4 inches) and drive them in straight. Use no longer than 2" screws and take your time. Glue glue glue! | |||||
|
Gold Member Username: HockeyknightPost Number: 1068 Registered: Apr-06 |
|
|||||
|
Gold Member Username: Adam_s15 TC9 Hybrid, RE MT Softparts Post Number: 1022 Registered: Aug-04 | Pics not working. | |||||
|
Gold Member Username: HockeyknightPost Number: 1069 Registered: Apr-06 | DAMN!!!!!!!! someone who know how to get pics up wanna help??? i can never ever get em to work!!!!! | |||||
|
Gold Member Username: WingmanaliveA pic is worth 1000 posts!! Post Number: 5563 Registered: Jun-06 | Are for me. Is that a triple stacked motor in the last pic? | |||||
|
Gold Member Username: HockeyknightPost Number: 1070 Registered: Apr-06 | sure is!!! | |||||
|
Gold Member Username: WingmanaliveA pic is worth 1000 posts!! Post Number: 5564 Registered: Jun-06 | Open them in paint, resize them under 600X600, save, use the upload image or attachment button below. |
|||||
|
Gold Member Username: HockeyknightPost Number: 1071 Registered: Apr-06 | k hold up a sec | |||||
|
Gold Member Username: WingmanaliveA pic is worth 1000 posts!! Post Number: 5567 Registered: Jun-06 | Holding. |
|||||
|
Gold Member Username: Logan__tilleHttp://com4.runboard.c..., Imortal Box ... Logan116600@... Post Number: 6913 Registered: Feb-06 | all you have to do is click on the link thing^^^^^^^^ the pics work | |||||
|
Gold Member Username: HockeyknightPost Number: 1072 Registered: Apr-06 | ya i cant get the paint thing to work so thats gunna have to do....sry guys | |||||
|
Gold Member Username: WingmanaliveA pic is worth 1000 posts!! Post Number: 5568 Registered: Jun-06 | Hold on man. | |||||
|
Gold Member Username: WingmanaliveA pic is worth 1000 posts!! Post Number: 5569 Registered: Jun-06 | ||||||
|
Gold Member Username: HockeyknightPost Number: 1073 Registered: Apr-06 | k.... | |||||
|
Gold Member Username: WingmanaliveA pic is worth 1000 posts!! Post Number: 5570 Registered: Jun-06 | Damn Ecoustics. 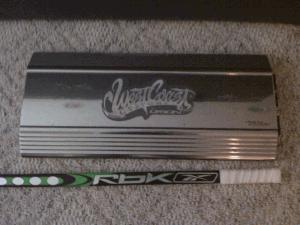 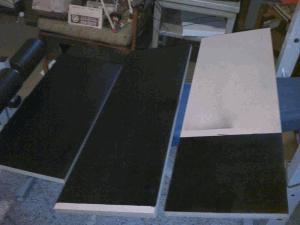 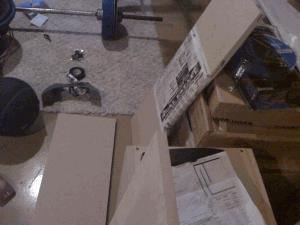 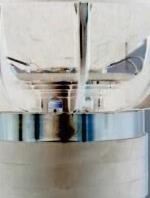 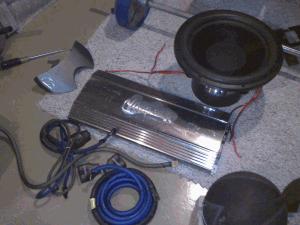 |
|||||
|
Gold Member Username: HockeyknightPost Number: 1074 Registered: Apr-06 | nice thanks Paul | |||||
|
Gold Member Username: HockeyknightPost Number: 1075 Registered: Apr-06 | bump it up | |||||
|
Platinum Member Username: RovinMy 1 12 Atom... Post Number: 11280 Registered: Jul-05 | good equipment ! but do pull off that ugly WCC emblem on that nice amp ....  |
|||||
|
Platinum Member Username: BestmankindLos Angeles, CA USA Post Number: 12044 Registered: Oct-05 | x2 on the wcc logo. it comes right off and there is a beautiful orion logo under there. lol. very nice stuff there. |
|||||
|
Gold Member Username: HockeyknightPost Number: 1076 Registered: Apr-06 | Really??? i was thinkin about it but i didnt know how or what was underneath!!!! so just yank on it or what do i gotta do???? | |||||
|
Gold Member Username: Johnfiac151.9db Dail... My wangers b... Post Number: 2263 Registered: Mar-06 | Look for screws... if you dont see any its prolly glued on or screwed from bottom side... if you dont see any screws just gently try to pry it up with a somthing and see if it pulls apart from it.. but if its glues.. glue marks FTL... im not sure how its on there... but it has to be 1 of those ways.. But if the screws are on the inside... id say leave it because you would have to remove the whole board from the heat sink..and if you ever did that before you would know... heatsinks + diodes dont seperate to easy and you ALWAYS have a chance of damaging it... | |||||
|
Silver Member Username: OneracistguyTWO EGG, FL USA Post Number: 552 Registered: Sep-06 | hey sweet u have my old amp i traded to marshal for the box sorry i scratched it up so much but its a strong amp |
Main Forums
Today's Posts- Home Audio Forum
- Home Video Forum
- Home Theater Forum
- Car Audio Forum
- Accessories Forum
- All Forum Topics